How to create folios
A folio is an collection of editions and/or artivles that you would like your readers to have available in one place. For example, a folio can contain a continuation of editions, an archive of editions, periodical editions, or simply editions you think will be interesting to a specific group of readers.
As a side note, the Folios section also enables you to set up a digital newsstand and start monetising your editions and articles! Monetising can be even more effective when you also make use of our tablet and mobile apps published through iTunes and Google play stores. To learn how to set up a digital newsstand have a look at this guide.
Now back to folios. Every Edition Digital account already comes with a folio in place so you just need to provide the basic information about the folio, select the styling, and add in your editions. Sounds simple? That’s because it really is.
Navigate to Administration and Folios where a folio is already waiting. Looking at the folio list from left to right, every folio is represented with its name, the number of items (editions) it contains, and its bespoke url address that will open a nicely designed and responsive landing page, where all the containing editions will be displayed.

Of course, it’s also possible to create additional folios, but at this point that’s limited only to plans that enable creating multiple titles, like the 10 issues plan. In this case, the folio page will also contain a Create new folio button that enables you to quickly provide a title and a description of the folio and add it to the list.
Adding editions to a folio can be done by clicking Add or remove editions at the bottom of each folio. This opens a list of all editions, which you have access to, and where you simply need to select the ones you want to include by clicking them once. Finalise by clicking Save & Close. To remove a single edition from a folio, look for X edition button that’s located on the far right of that edition.
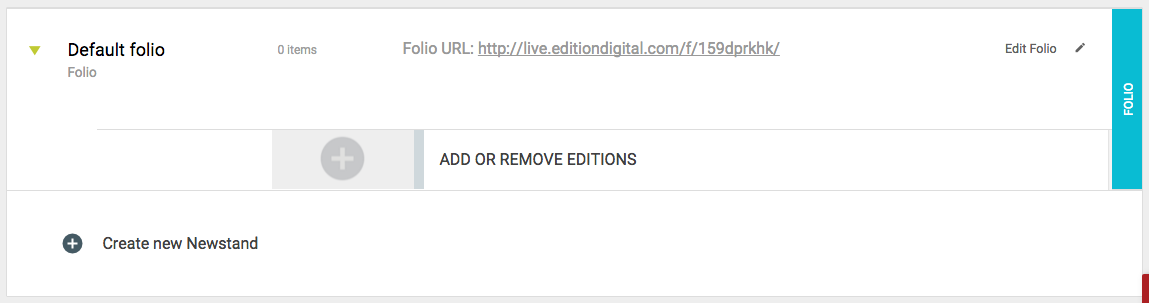
On the far right of each folio there is also a pencil icon, which you can click to start editing your folios’ appearance. When you do so, a new window opens that’s very similar looking as the Workflow. That’s because, much like an edition, a folio also consists of different aspects, which you can control, and these are nicely organised in individual tabs: General, Footer, Users.
General tab
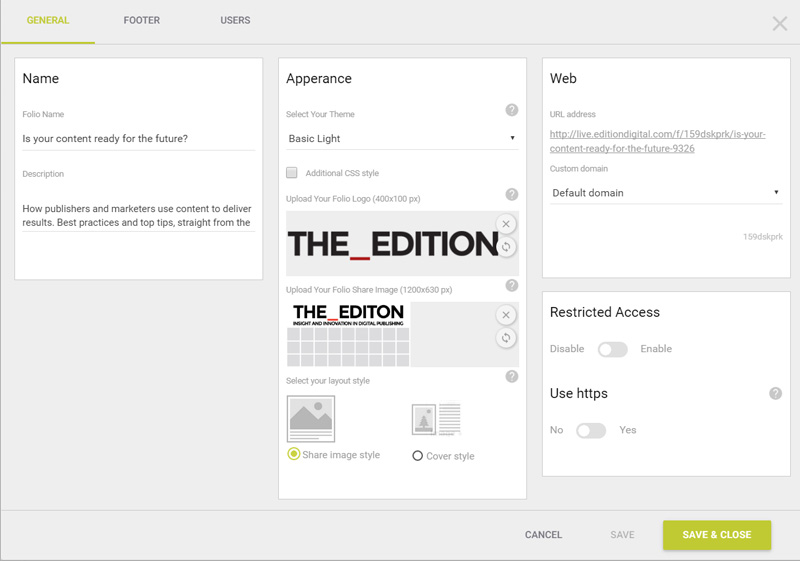
The first tab from the left is where you’ll need to provide a name and a description of the folio. These two bits of info are quite important because they give your folio its identity. Also add a folio logo and you’re on the right track. The name, description, and logo will appear at the top of the folio page itself, but they are also displayed when a folio URL is shared on social networks, so make sure that you provide the share image as well.
In terms of styling the folio page, we've prepared an array of different themes, which you can quickly select in the Appearance section. However, if your fingers are itching to create some custom CSS overrides and use them to customise your folio’s look, we've thought of that as well. What you’ll need to do is check the Additional CSS style and provide your custom CSS overrides in the corresponding field. There's also an option that let's you decide how the editions will be represented, as portrait magazine covers or as landscape share images.
The General tab is also where you can select which domain you want to assign to your folio, provided that at least one custom domain has been set up beforehand. If you feel a bit lost on this subject, please have a look at this article that’s dedicated to setting up custom domains and things will quickly start to make more sense.
In addition, you can also restrict access to your folio, which comes in pretty handy when the content is not intended for a wide audience: internal documents and whitepapers are just a couple examples that come to mind. To do that locate the Restricted access section and flip the switch to enabled. After that, the folio contents will be available only to verified users, which you have added using the Users tab. You can learn how to do that a few paragraphs down.
When you are required to use the HTTPS protocol you can do so by enabling the Use HTTPS option. With this you will gain better SEO recognition (over time), a more secure connection, and the option to redistribute the edition's links within other HTTPS secure sites via iFrame. Just make sure that all pop-ups (shapes or images with a pop-up action) utilise a HTTPS secure address, which must also be used when embedding images from 3rd party servers into text blocks and mobile versions.
Footer Tab
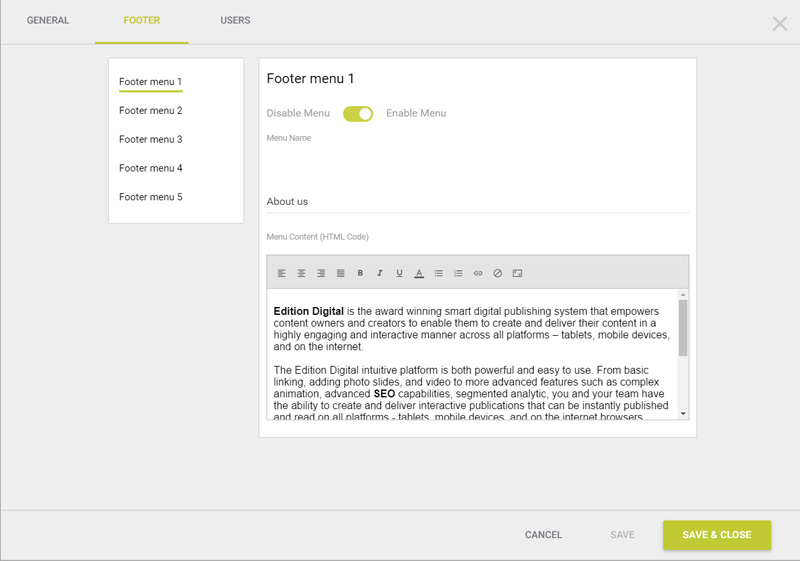
You will most likely also want to provide a bit of context about your folio, perhaps some sort of privacy policy, or even an about us page. This is easily achieved in the Footer tab, where you can enable up to three footer menu links that will display the desired content when clicked. To do that select one of the Footer menu items on the left-hand side to reveal the corresponding options on the right-side. Next, flip the switch to Enable menu, provide the menu name, and, using the text editor, provide and style the content that you want to be displayed when that footer link is clicked.
Users tab
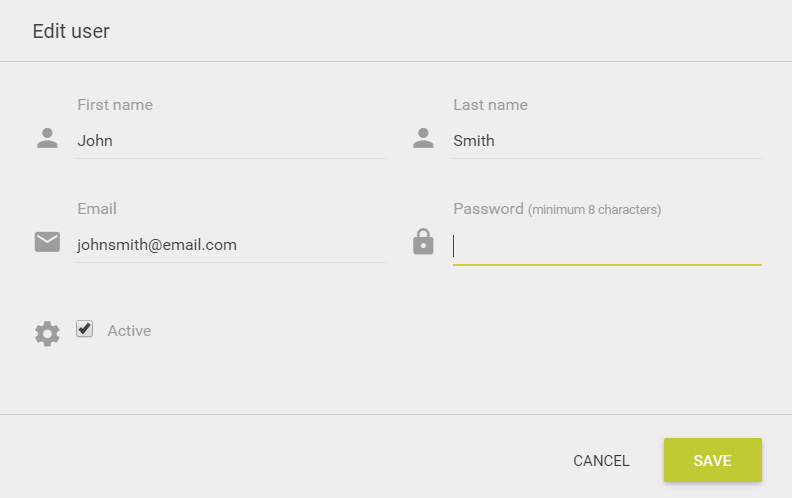
The last tab, called Users, is a user administration in a very basic form. It enables you to create user accounts that will be able to access your folio and view containing editions. To do so, click Add user at the top and provide the user’s first name, last name, username, email, and password. Then, click Add user and the user list will be updated with a new entry, as expected.
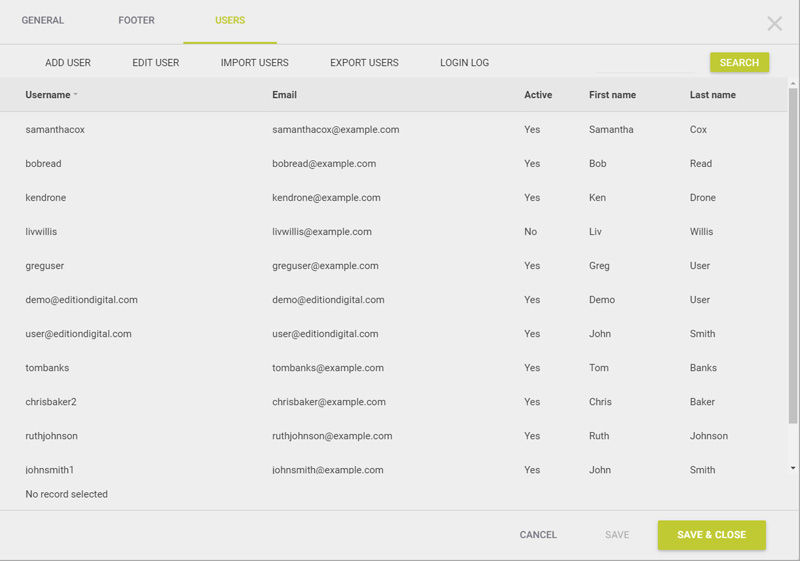
However, when a certain user doesn’t require access to your folio any more, select that user and click Edit user at the top. The previously provided user information will appear in a popup where you can update the info and deselect the Active option to prevent further access to the folio. The folio will request user credentials only when the Restricted access option in the General tab is enabled.
Adding new users is also possible by importing a comma separated .txt or .csv file. These files need to be formatted in a specific way, so the system knows how to interpret the containing information, but it's not complicated. First make sure that the first row of the file contains these labels: username, password, active, email, first_name, last_name. Then jump in the next row and provide the corresponding information for one user, whereby separating each bit with a comma, like so: johndoe(min. length 6), fjezh57fjd728(min. length 8), 1 (1 for active, 0 for inactive), johndoe@email.com, John, Doe. Do the same thing for all the rest of the users. If, however, you require to have all the user information stored locally at some point, you can export all the user information to a .csv file.
Once you’ve finished setting up your folio, all that’s left to do is grab the folio link from the list and share it with the world, or just specific people, depending on its purpose, of course.
