How to insert new pages from a PDF
To start inserting new pages into your existing digital edition using a PDF, open the Workflow window, navigate to the Pages tab and select the page that will precede the ones you have set out to insert. Now look for the Insert multiple pages icon that’s located in the bottom right-hand corner. Click it and select Insert pages from PDF. Simply drag-and-drop the PDF in the dotted line area also called the drop zone, or click that area to browse for it using your operating system’s default file explorer. When you want to insert all pages from the provided PDF, all that’s left to do is to click the Insert button and the system will take care of the rest.

However, when you want to insert only specific pages from the provided PDF, you’ll also need to check the Range option and let the system know exactly which pages to use by providing their consecutive numbers in the adjacent input field like so: 1,5,17,24. Ranges of pages can also be inserted like this: 33-37, 40-58. If the situation calls for both, you can mix things up like this: 4,6,8-14,20, 25-34.
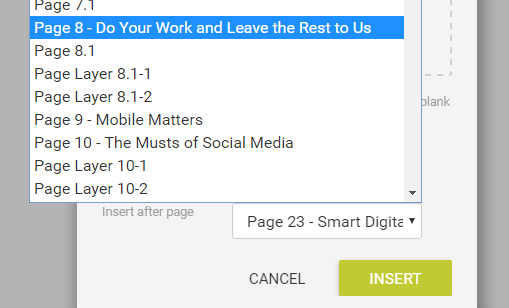
The process of inserting new pages from a PDF also offers a third option called Insert after page. If you’ve selected one of the existing pages from the sequence after which new pages will be inserted, this option will reflect that, so you can leave it as it is. If you haven’t selected a preceding page, however, or you want to select a different one, this option enables you to do that by using the corresponding drop-down menu. With all the options in check you can proceed by clicking the Insert button. The system will upload your PDF, process the pages, and after a few short seconds, update the page sequence with new pages.